 Travel Guide Travel Guide to the countries of the world

This post is also available in:
![]() Deutsch
Deutsch
Written by Marco Ramerini. If you have ever tried to take photos of the stars at night, you will have realized that you need a stable tripod to be able to take as long exposures as possible in order to collect as much light as possible. With the tripod stopped even with a wide angle, the exposure time limit cannot exceed 30 seconds. Otherwise you will have non-point stars and will only photograph the traces of the stars caused by the rotating movement of the Earth. In order to lengthen the exposure and obtain images of point stars it is necessary to balance the earth’s movement with a star tracker. In this review we talk about the Star Adventurer SkyWatcher. A portable star tracker that allows you to take pictures of the sky by compensating for the rotation of the Earth.
DESCRIPTION OF THE INSTRUMENT
The weight of the central body is only 1.2 kg. To this must be added the weight of the Latitude Base (or equatorial head) and some accessories that allow the positioning of the camera on the tracking star. The star tracker has a maximum load capacity of 5 kg and good tracking accuracy. Considering these values we can say that it is undoubtedly suitable for being loaded with a digital SLR camera and with lenses up to a maximum focal length of 300 mm.
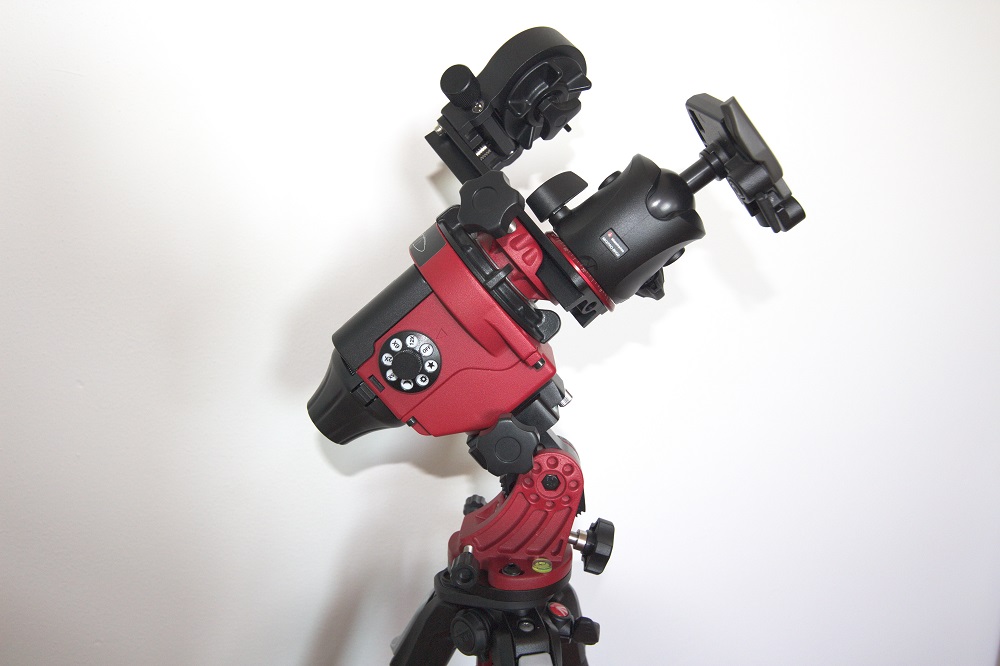
The kit we tested is formed by the body of the Star Adventurer SkyWatcher with integrated polar scope, by the illuminator for the polar scope, by the Latitude Base (or equatorial head), by the fitting for the ball head, by the L-bracket for the camera o small telescope and 1 kg counterweight with fixing rod. The star tracker is powered by 4 AA batteries (stylus) or with a USB connector. All this is accompanied by a good manual in English. The cost of the fully equipped star tracker is around 360 Euros (if you add the counterweight, it is 25 Euros more).
TYPES OF SPEED SUPPORTED
The Star Adventurer SkyWatcher supports three types of speeds: solar, lunar and sidereal. There are also 4 other speeds for Time-lapse. You can also automatically control the shutter of a DSLR camera (DSRL) via a cable (not supplied). But I prefer to use an external timer to be applied to the camera.
HOW TO ASSEMBLE THE ASTRO TRACKER
To mount the star tracker you need a good photographic tripod, I use a Manfrotto 190XPRO4 aluminum tripod. The tripod is equipped with a Manfrotto BHQ2 ball head. This combination is calibrated to carry a maximum weight of 7 kg.
The Latitude Base (or equatorial head) is easily screwed onto the tripod screw. After positioning the Latitude Base (or equatorial head), be careful to unlock the lever before changing the base latitude (which is not well specified in the manual). Subsequently, the body of the Star Adventurer SkyWatcher is positioned first, however, you must have unscrewed the adapter screw (thread converter from 1/4 “to 3/8”) which is usually already positioned in the body of the Star Adventurer (this instead is clearly specified in the manual ).
When inserting the Star Adventurer SkyWatcher into the equatorial head, we must make sure that the set screw is facing forward (upwards) as is clearly reported in the instruction manual.

HOW TO ORIENTATE THE STAR ADVENTURER SKYWATCHER
At this point, the next step is to direct the Star Adventurer SkyWatcher towards the polar with the help of the polar scope. To help you, the polar scope is also equipped with an illuminator. Here a small problem arises: it is not specified anywhere in the manual what type of battery to use to power the tiny bulb in the illuminator. You can also do without, using a different light source.
Adjust the equatorial head to approximately the latitude of the place where you are. Find the polar and make it possible by moving the equatorial head and leveling the tripod to bring it inside the polar scope. Then use an app for your mobile phone, I use Polar Finder to see where you should put it at the crossroads, after you have positioned the polar pinch the clutch ring of the Star Adventurer and lock everything. Once you have leveled the tripod and positioned it in the right place, you are ready to start the photo session. From this point on, it is essential not to move the tripod and all the other screws. To point to the area of the sky you want to photograph, you can only move the camera through the ball head.
PLACE THE CAMERA AND MAKE THE FOCUS
Mount the ball head and mount the camera on it. Put the selector of the star tracker on N (for the northern hemisphere) or on S (for the southern hemisphere) and turn on the Star Adventurer positioning it on the sidereal speed. The noise of the engine is almost imperceptible from how quiet it is, but the instrument does its job and, if you have pointed towards the celestial pole with accuracy, it chases with excellent precision.
At this point, manual focus is required. Put the lens on manual focus, use live view and center a distant light (or star). Increase the magnification of the live view up to 10x then focus the light in the best possible way. Do this very carefully. After focusing, insert the timer cable into the reflex, turn on the camera and place it on manual. Use the BULB exposure time. Set the white balance on the sun and shoot in the RAW format that will allow you to edit the photo in post production (the best and most powerful tool for post production is obviously Photoshop). Experiment by changing the sensitivity, generally the best results are obtained at 800, 1,600 or 3,200 ISO.
Set the timer according to the exposure time you intend to use and set how many photos you want to take. If you take multiple exposures make sure that there is a small interval between one shot and another because the camera takes some time to save the RAW format (remember to have removed the automatic noise reduction on large exposures otherwise it takes a few minutes to save the image).
NIGHT TEST ON THE FIELD
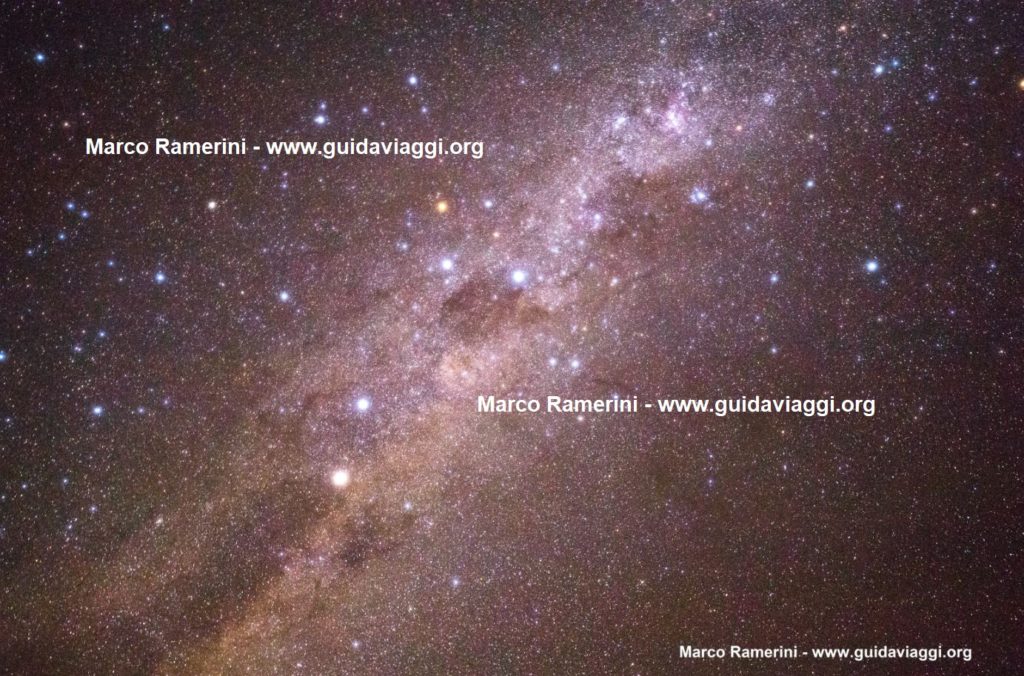
The first test of this tracker was made during a new moon evening but with a huge humidity rate and sometimes with a slight veiling. We tried tracking using a Tokina 11/20 mm F2.8 wide angle lens and a Canon USM 70/300 mm F4.0 lens. With the 11 mm we pushed up to 5 minutes of exposure. With the 70 mm we made exposures up to 4 minutes without problems. If the 70/300 mm zoom lens is used, the counterweight (optional) must also be used, otherwise in certain configurations there is a risk of unbalancing the instrument, resulting in blurred photos.
The Star Adventurer surprised us positively: If the pointing of the polar star is carried out with precision, the Star Adventurer follows without problems even with rather high focal lengths. Some of the results of the evening are published on this page.
Instrumentation used:
- Star Adventurer SkyWatcher (with integrated polar scope, illuminator for polar scope, Latitude Base (or equatorial head), ball head fitting, L-bracket for the camera or small telescope and 1 kg counterweight with fixing rod).
- Tripod Manfrotto 190XPRO4 in aluminum.
- Ball head Manfrotto BHQ2.
- Canon EOS100D digital SLR camera.
- JJC tm-c timer remote control for Canon.
- Tokina 11/20 mm F2.8 lens.
- Canon USM 70/300 mm F4.0 lens
- Electric torch.
- Mobile phone with Polar Finder app.
This post is also available in:
![]() Deutsch
Deutsch

